
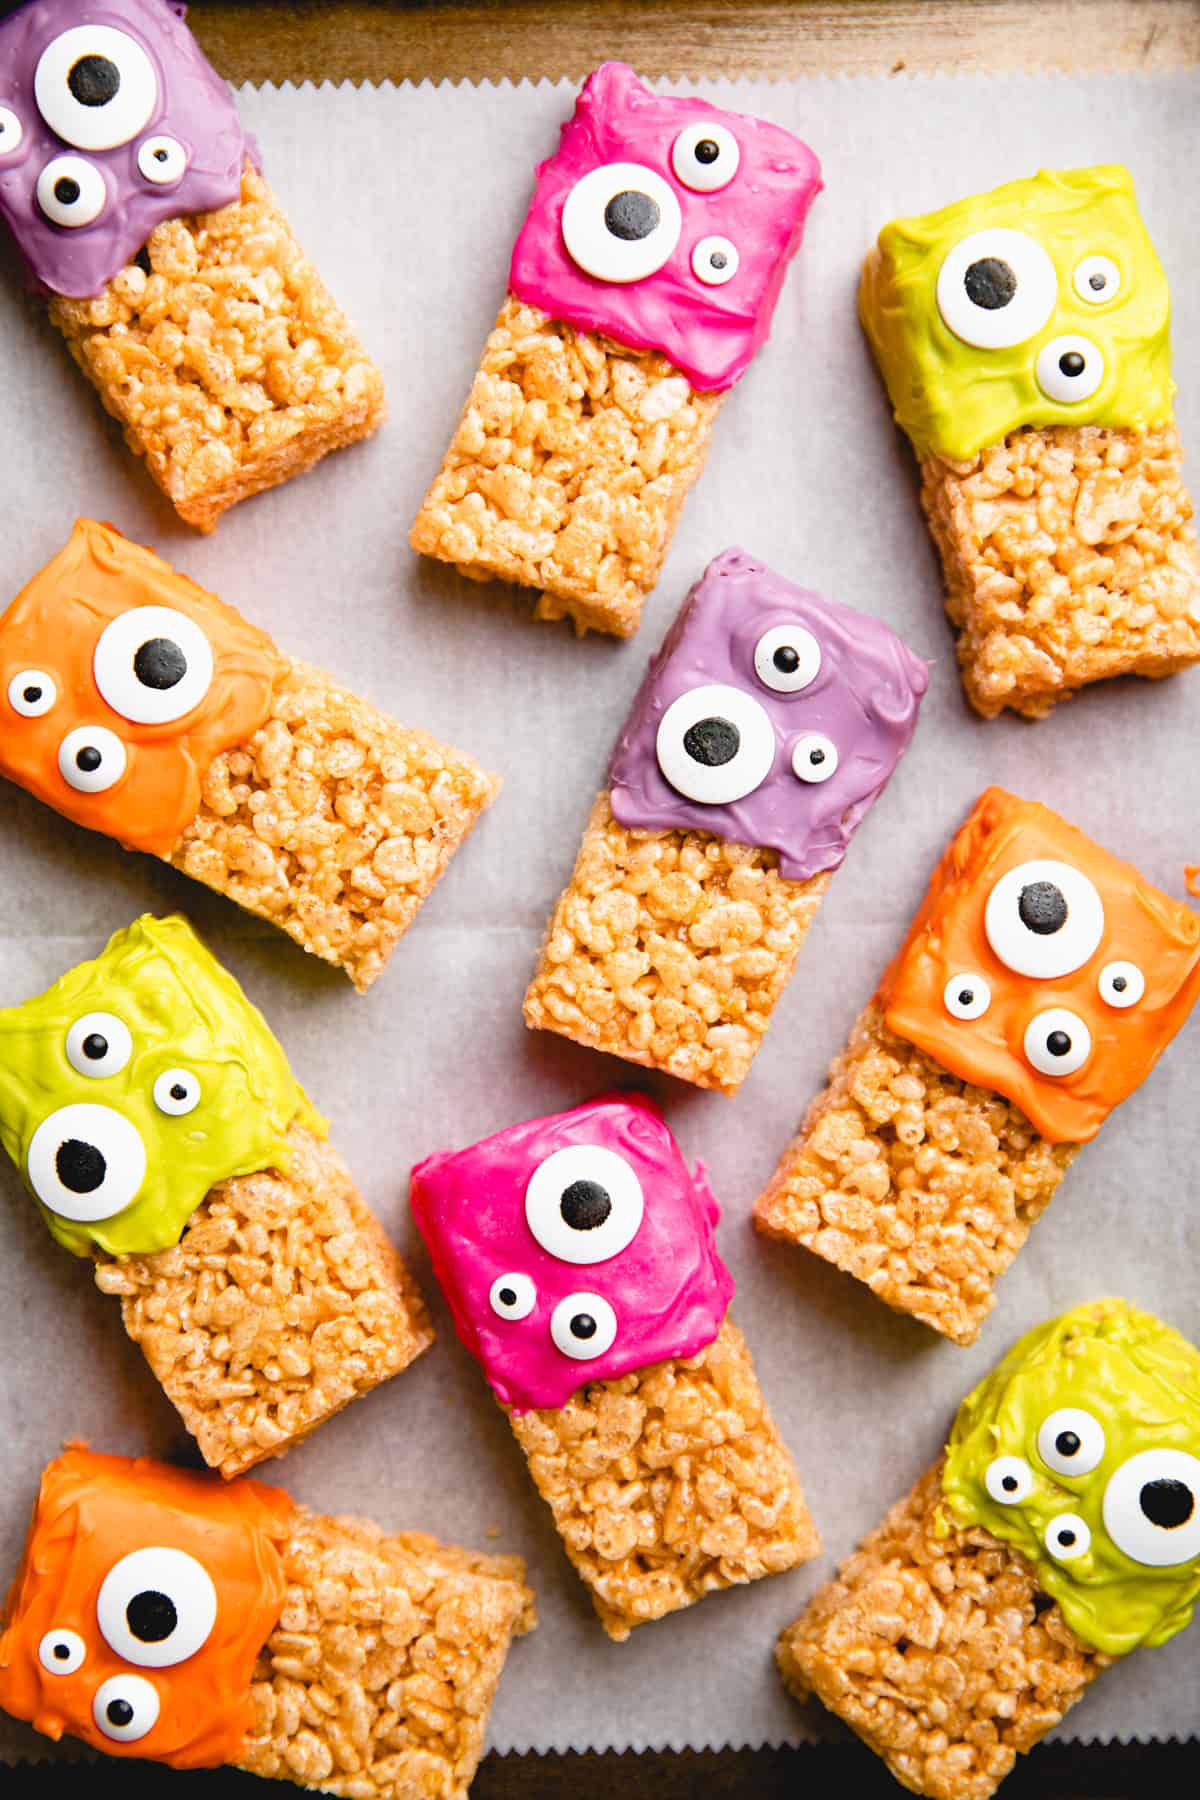
Make these fun Monster Halloween Rice Krispie Treats to celebrate trick-or-treats! This recipe is super easy to make together with kids and will be a spooky surprise for any Halloween party!
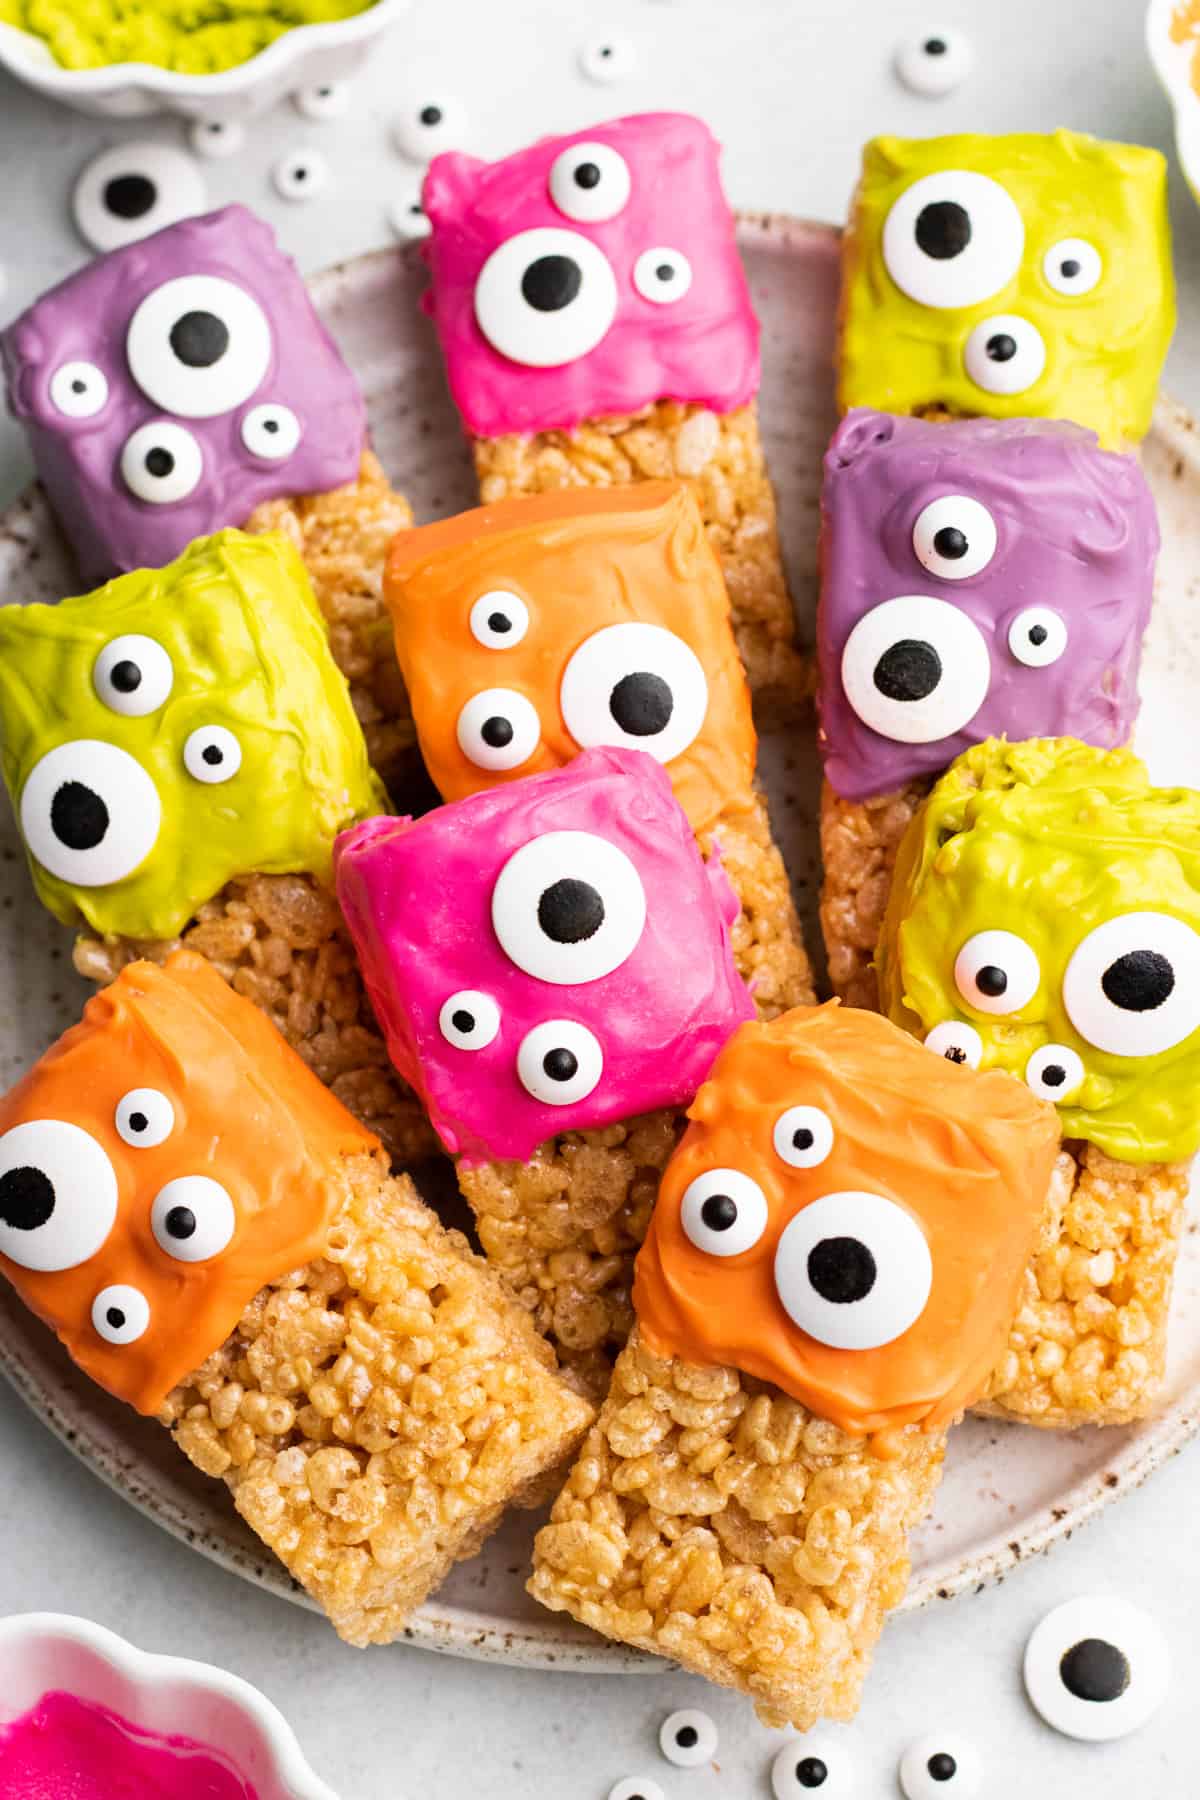
These adorable Monster Halloween Rice Krispie Treats will be so much fun for your kids to create! They require only 3 ingredients, lots of imagination, and an extra bucket of laughter!
This recipe doesn’t involve cooking but more crafting skills. We will need only 3 ingredients:
- Rice Krispie Treats. I prefer to buy prepackaged ones. Although, if you want, you can make them from scratch.
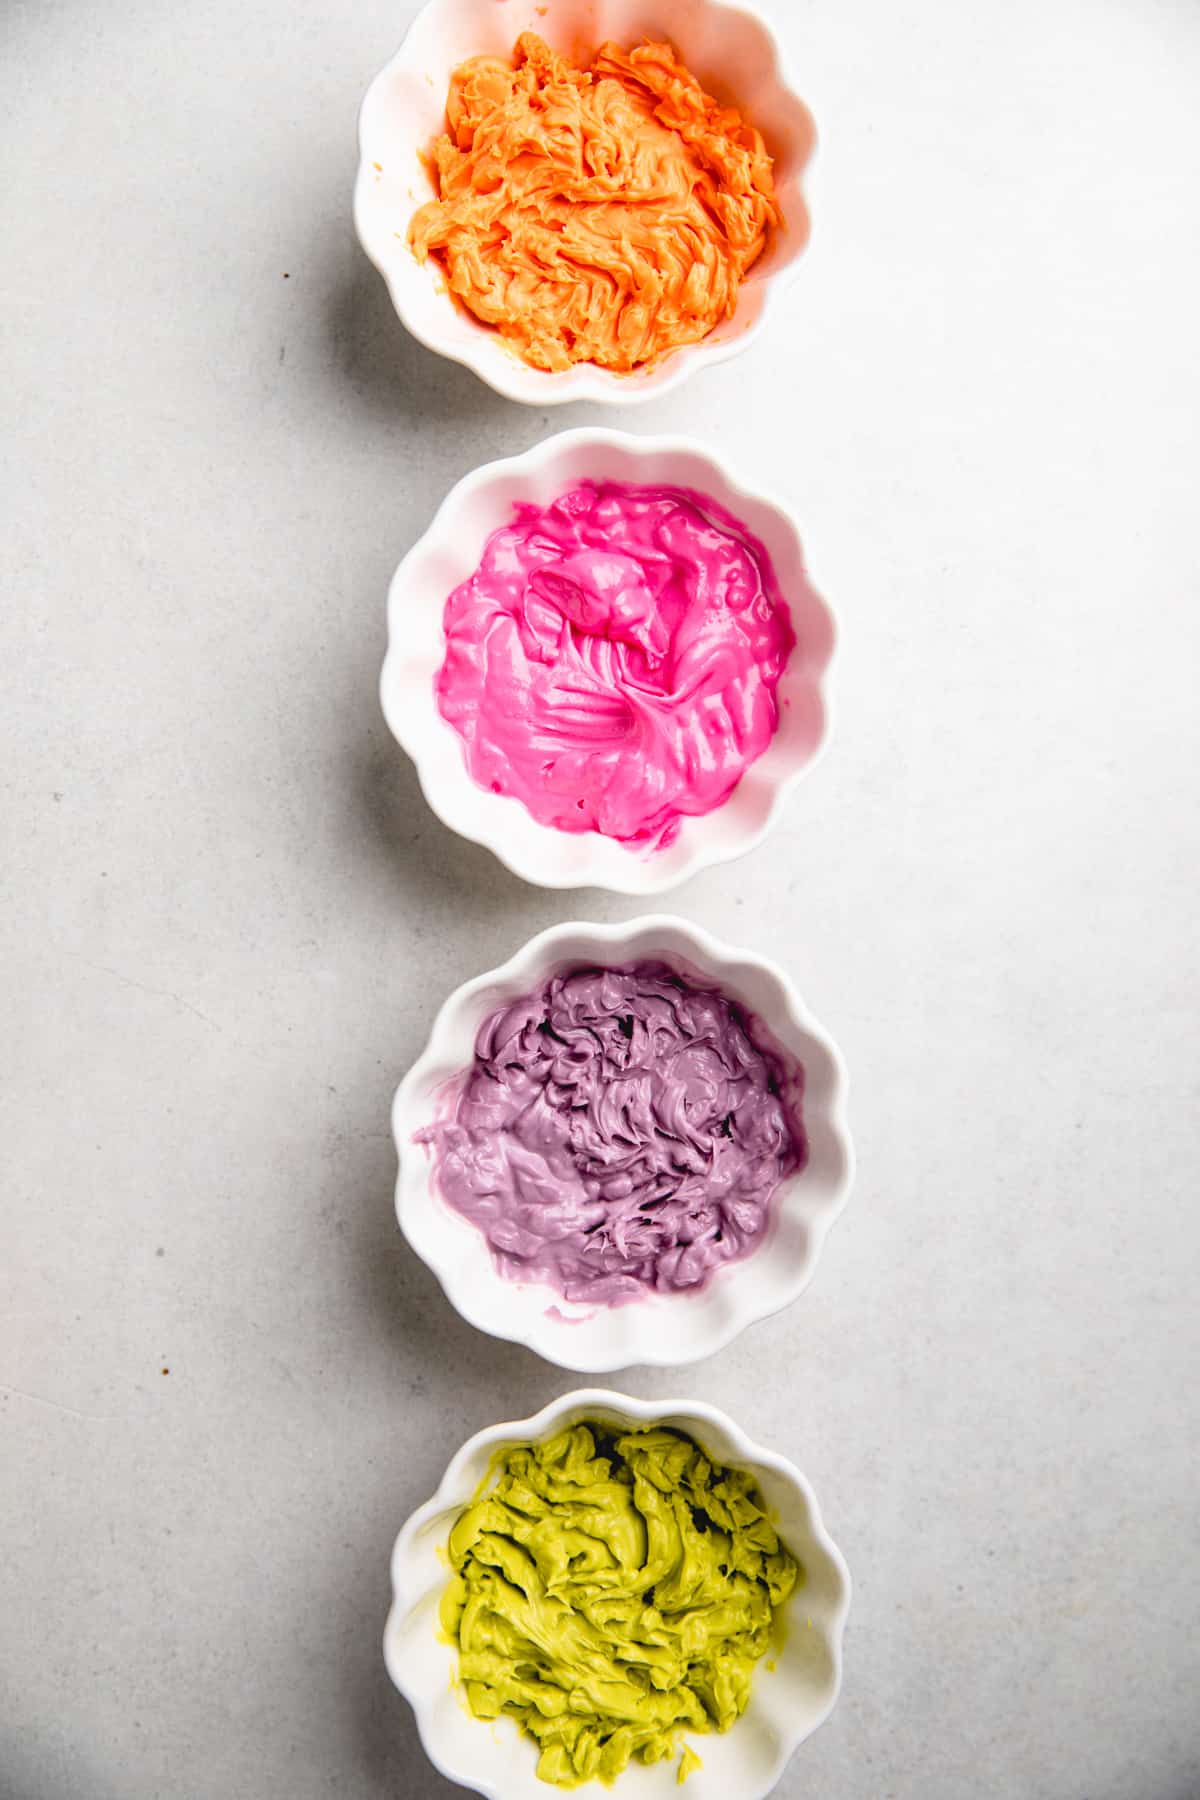
- Candy Melts. I used Wilton brand (not sponsored) as they are easy to prepare and have great colors. My favorites are orange, green, purple, and pink.
- Candy Eyes. I also used Wilton brand, because they sell packages containing different eye sizes.
I also love making my Halloween Sugar Cookies and Monster Cookies together with these treats. They are fun to decorate and very delicious!

How to make it
Melt candy melts as directed on package.
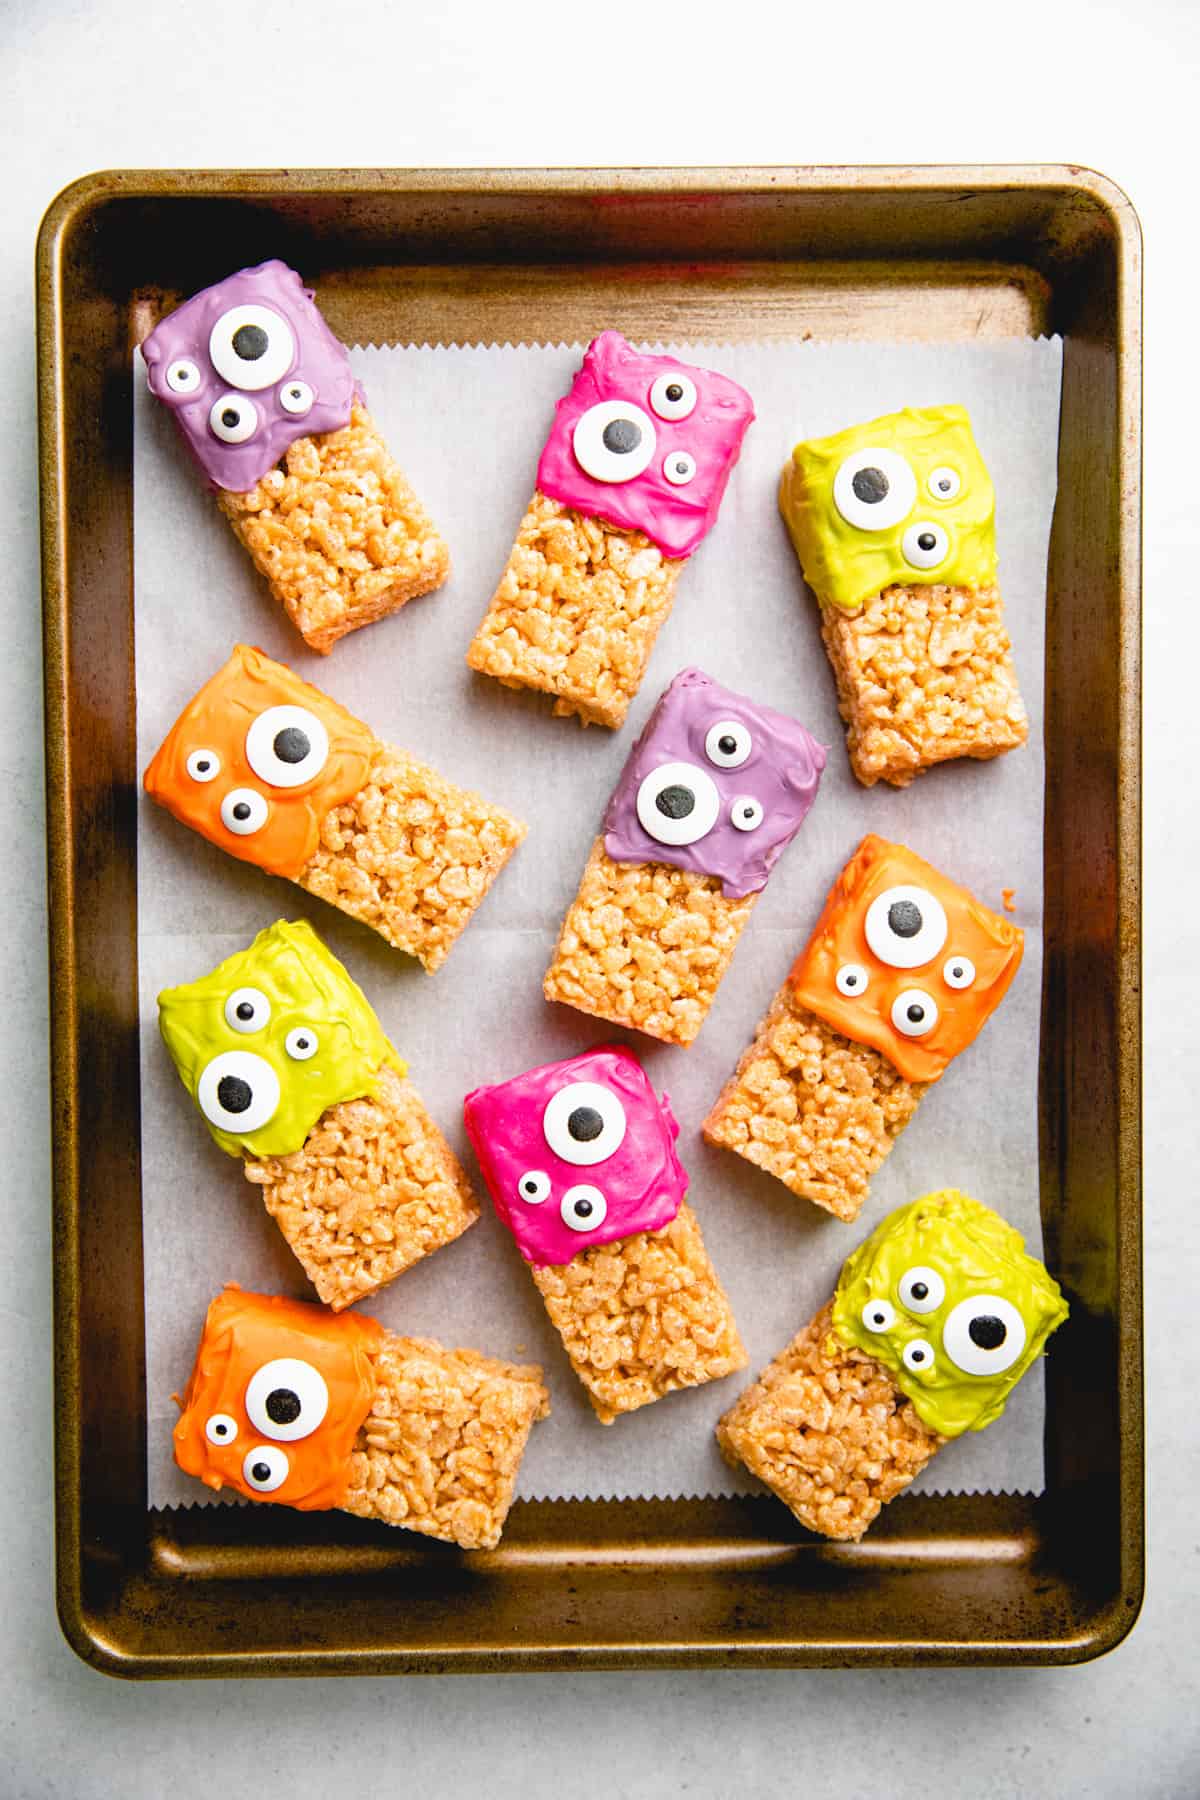
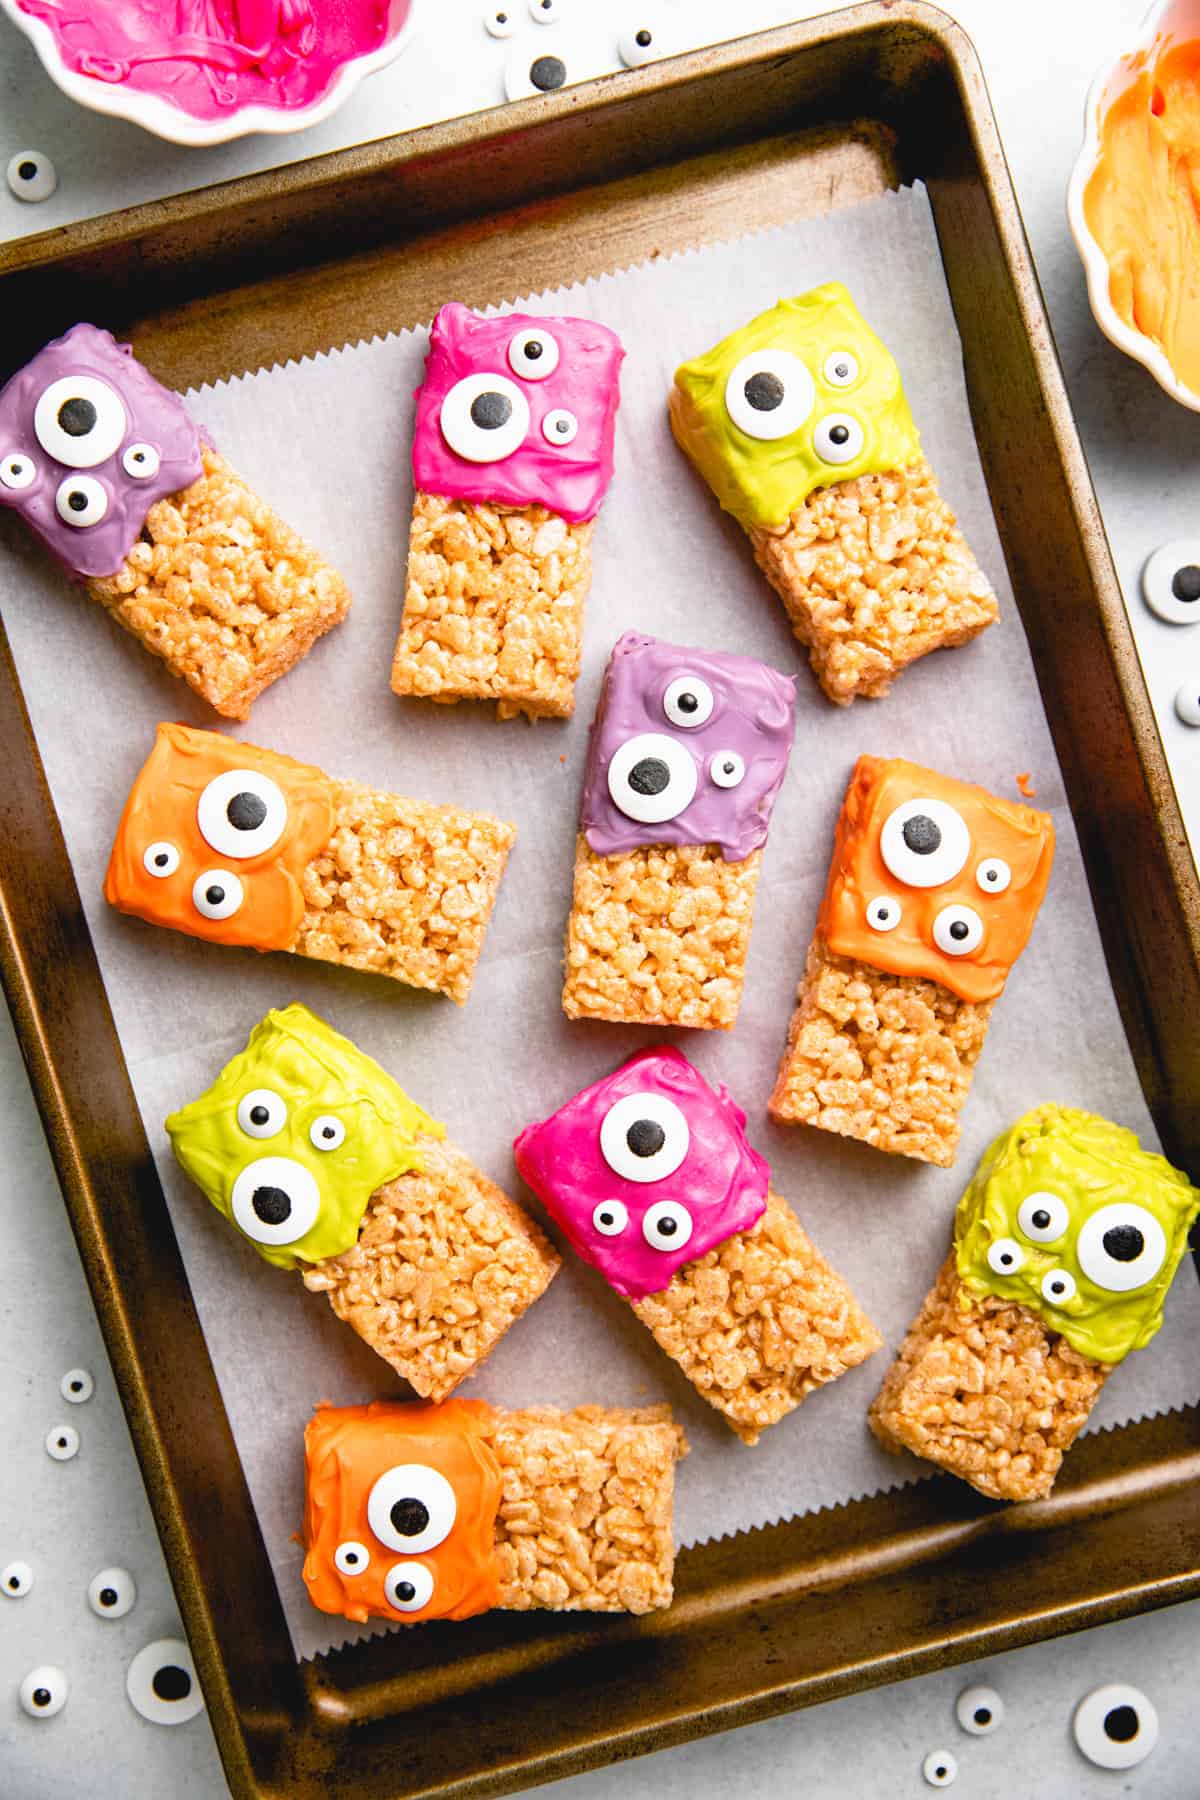
Dip ⅓-1/2 of a rice krispie treat into the melted candy melts. If the icing is not runny, you can spread it over the krispie treats with a knife
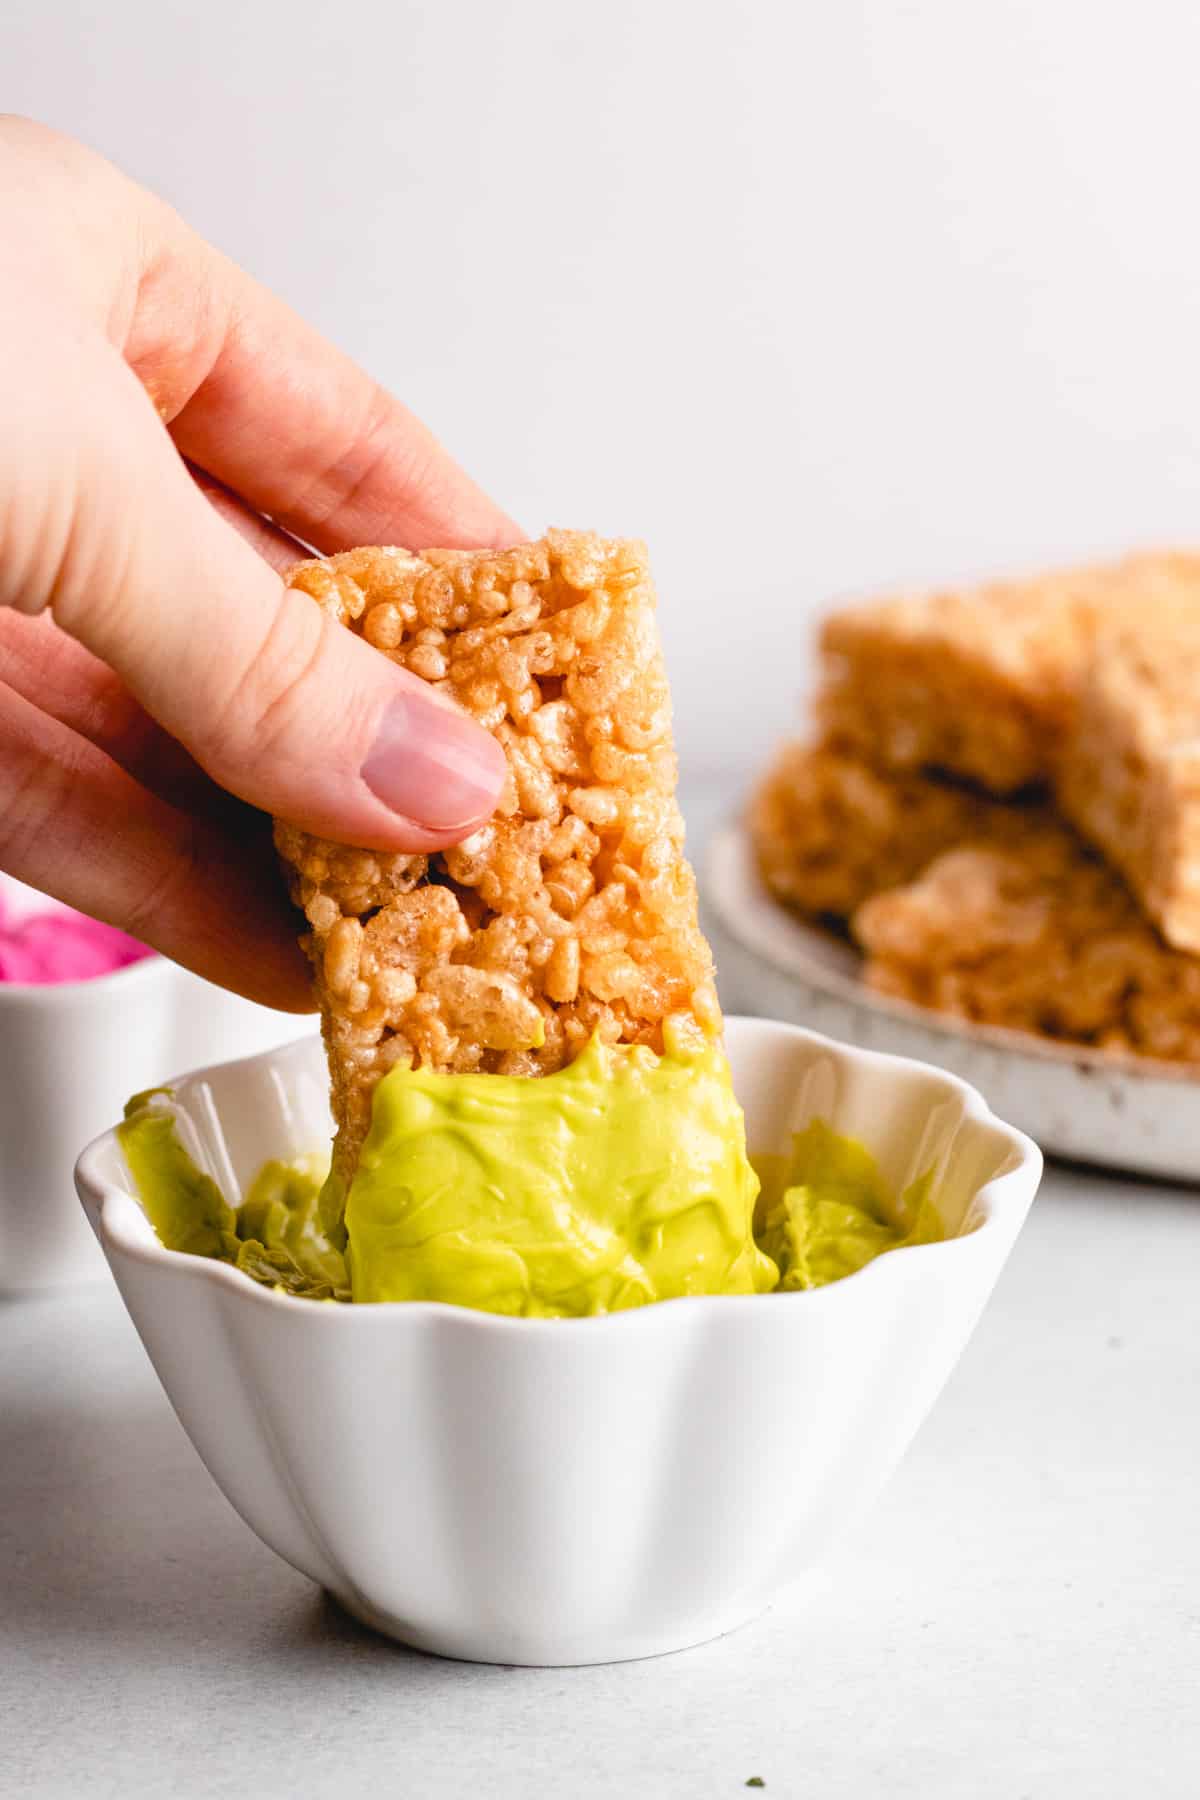
Place it on a baking sheet with parchment paper and repeat the same with the rest of the treats.
Place the candy eyes on top of the icing and let it set completely for at least 30 minutes.
How to melt Candy Melts
Candy melts are different from white chocolate and don’t contain any cocoa. That is why you cannot melt them the same way as you would regular chocolate.
The easiest way to soften them is to use a microwave.
- Put the candy melts in a microwave-safe bowl.
- Heat them in a microwave for 1 minute at 50% power (do NOT use 100% power, or they will become hard!).
- When done, take them out and stir. They still will look a bit hard.
- Put them back at the microwave and heat for 15 seconds increments at 50% power, stirring in between until soft and smooth.
If you overheat them, they will become hard and won’t spread. To fix it, you can add a little bit of shortening. When you stir them together, at first it will look clumpy but then will start to thin out to the right consistency.
Also, make sure you DON’T add any water! Otherwise, the melts will get hard and it will be difficult to fix.
Tips for Best Results
- Candy Melts. Make sure you fully read the instructions above on how to properly melt the candies to get the right consistency. It’s not difficult, but if you never used them before it might be tricky.
- Setting. If it’s warm at your house, it will be better to place these “monsters” in the fridge to set completely.
Options and Substitutions
- Sticks. You can attach popsicle sticks or sturdy straws to the bottom of the rice bars, so they will look like lollipops.
- Sprinkles. You can have more fun and add some colorful sprinkles to the decoration.
- Candy Melts. If you can’t find candy melts in your area, you can melt regular white chocolate and add a few drops of food coloring. It might need a bit longer time to set, but will look very similar.
Frequently Asked Questions
If you have any leftovers, you can keep them in an air-tight container for 2-3 days at room temperature or for up to a week in the refrigerator. I prefer to line them with parchment paper in between to prevent them from sticking to each other.
You will need about 10 candy melts for each treat. You will always have some leftovers
More kids friendly desserts:
- Zucchini Banana Bread
- Buttermilk Blueberry Muffins
- Chocolate Chip Blondies
- Healthy Chocolate Zucchini Muffins
- One Bowl Banana Bread
- Healthy Morning Glory Muffins
- Healthy Banana Chocolate Chip Muffins
- One Bowl Brownies
- Donut Sugar Cookies

Halloween Rice Krispie Treats
Ingredients
- 10 rice krispie treats
- 100 candy melts colors of your choice
- 30-40 candy eyes
Instructions
- Melt candy melts as directed on package.
- Dip ⅓-1/2 of a rice krispie treat into the melted candy melts. If the icing is not runny, you can spread it over the krispie treats with a knife.
- Place it on a baking sheet with parchment paper and repeat the same with the rest of the treats.
- Place the candy eyes on top of the icing and let it set completely for at least 30 minutes.
Notes
- Make sure you fully read the instructions above on how to properly melt the candies to get the right consistency. It’s not difficult, but if you never used them before it might be tricky.
- If you can’t find candy melts in your area, you can melt regular white chocolate and add a few drops of food coloring. It might need a bit longer time to set, but will look very similar.
- If you have any leftovers, you can keep them in an air-tight container for 2-3 days at room temperature or for up to a week in the refrigerator. I prefer to line them with parchment paper in between to prevent them from sticking to each other.


There are the cutest Halloween treats! You definitely nailed it with those beautiful bright colors!
Ok I can’t get over how CREATIVE this is. Definitely going to do this with the kids next month, makes regular rice krispie treats look so boring!
These are so fun and the perfect amount of spooky! I’m gonna love making these at Halloween!
Halloween is going to be here so soon! I have bookmarked these spooky treats to make with my kiddos.
This will be my first year celebrating Halloween with a toddler, and I think he’ll really appreciate the cuteness of these – let alone how easily he can dip the Rice Krispie squares in candy melts!
This is so creative and cute. I can’t wait to make this. I’m sure the kids will love it!
How cute are these! Love the whimsical colors too. Making this for Halloween
These were so fun and easy to make, and a huge hit with kids. We’ll be making them again this year!
These looks so fun for Halloween! Bookmarked for the kids.
These Halloween treats are so cute! Easy to make and great for class parties or to celebrate the season.
This is so cute and really easy to make! Will surely make this again, thanks a lot for sharing this recipe! Well done!