
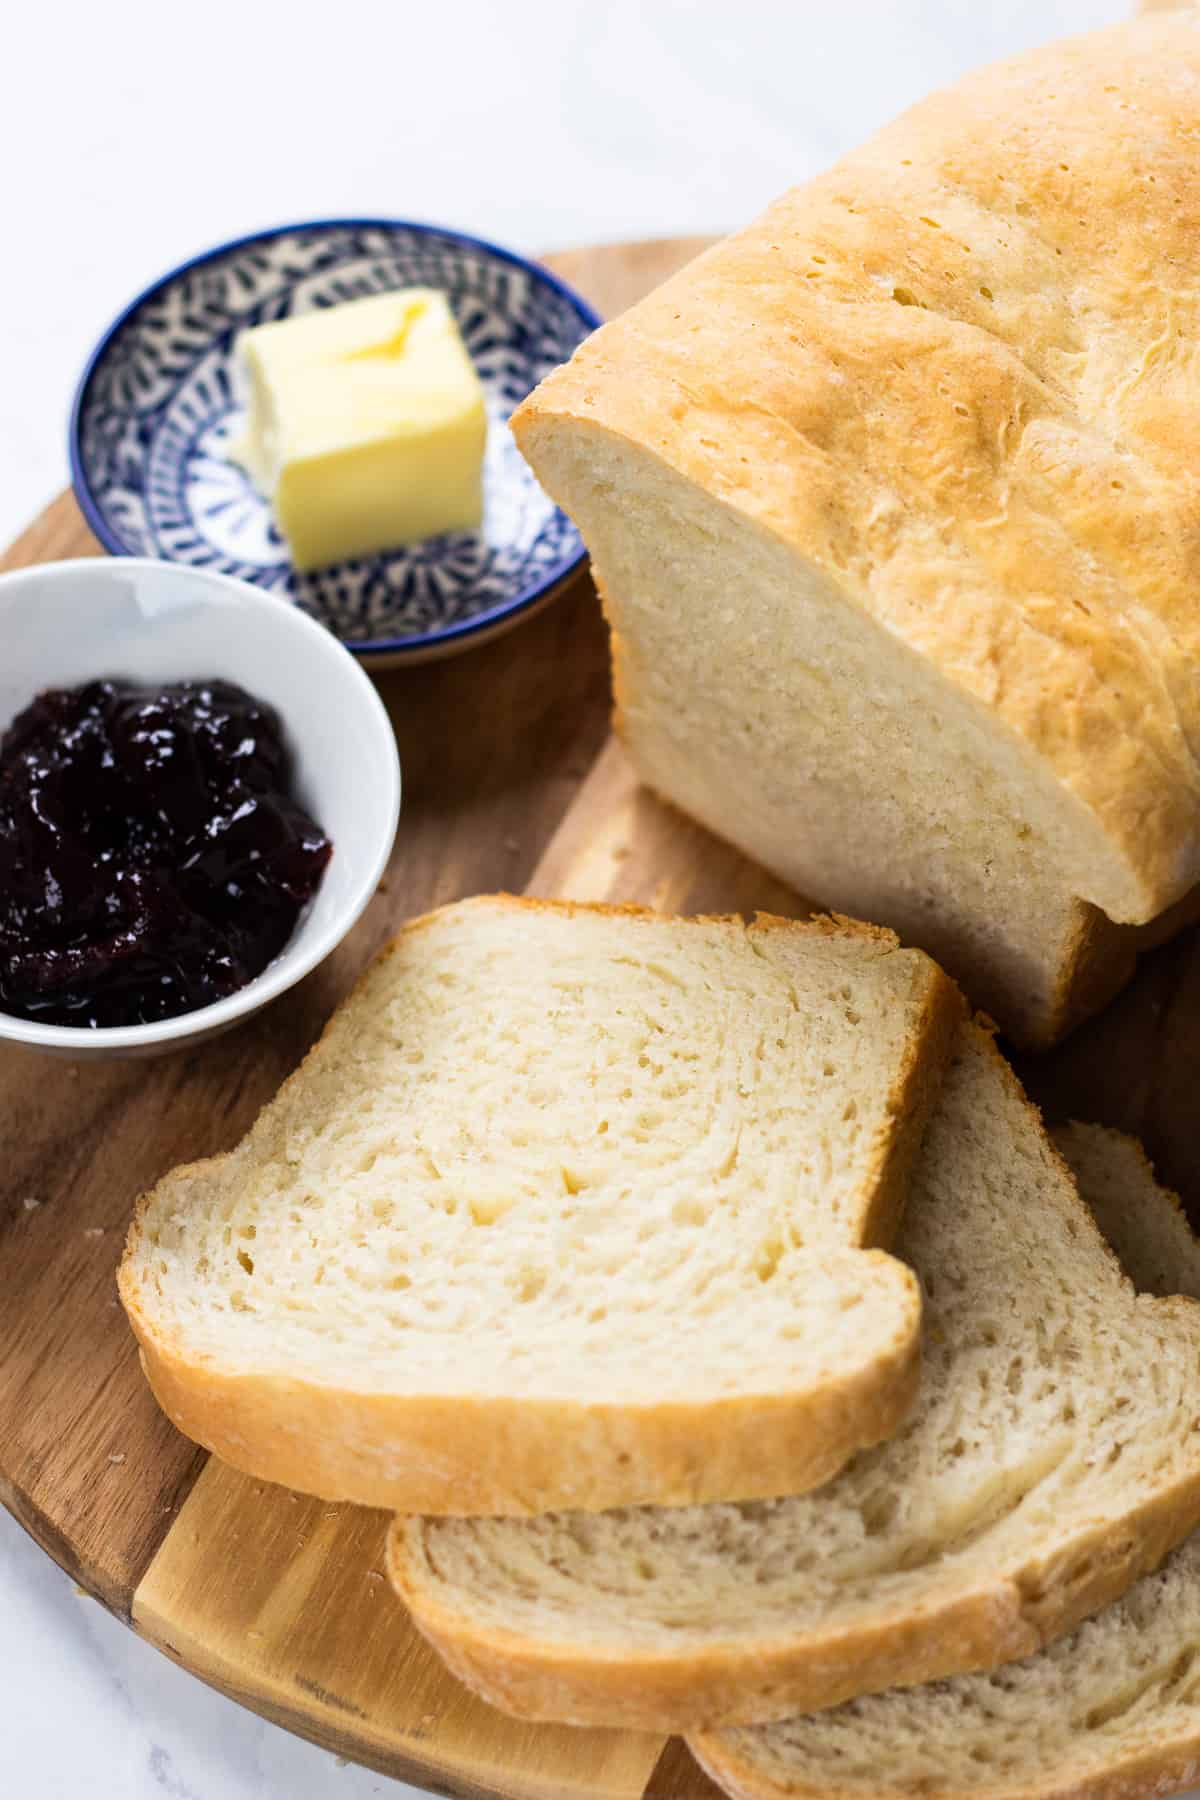
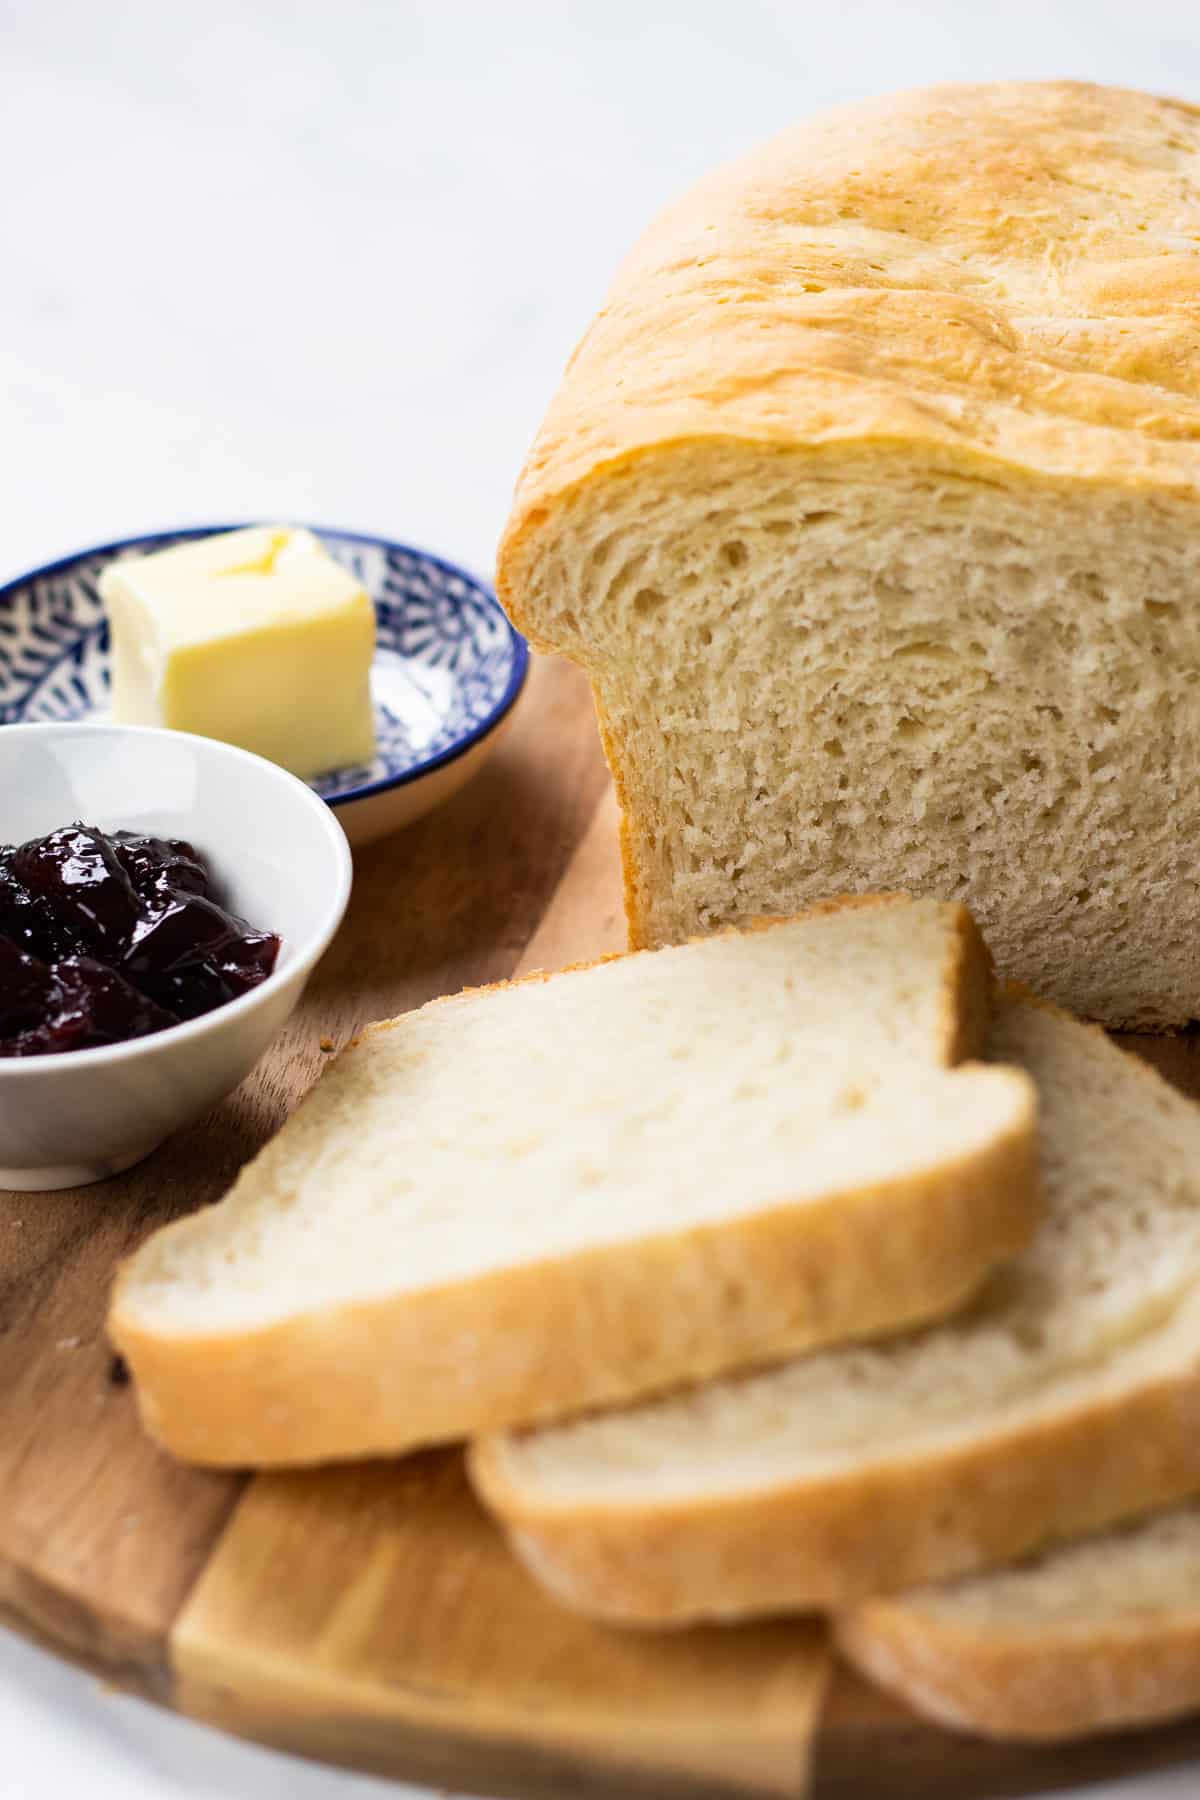
Learn how to make a delicious loaf of bread at home with just 7 simple ingredients. This foolproof recipe with a step by step tutorial will help you to make the best classic white bread that will be perfect for sandwiches and toast!
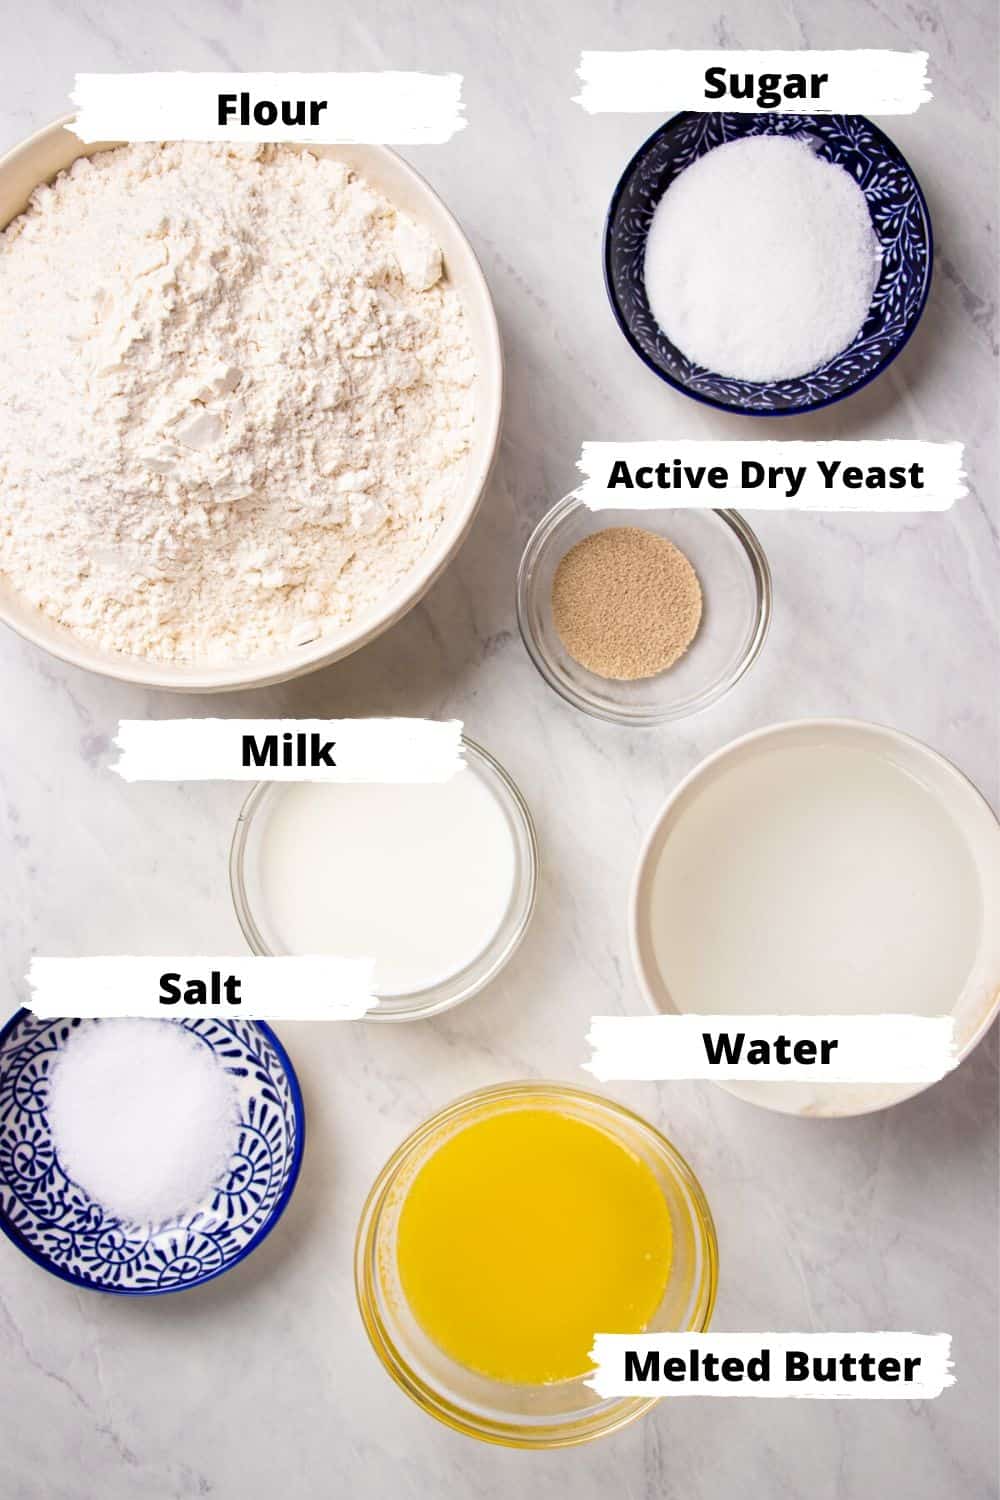
Making bread at home is much easier than you think. Using just 7 ingredients (water, milk, active dry yeast, sugar, salt, and flour) you will have a delicious soft sandwich bread for your whole family!
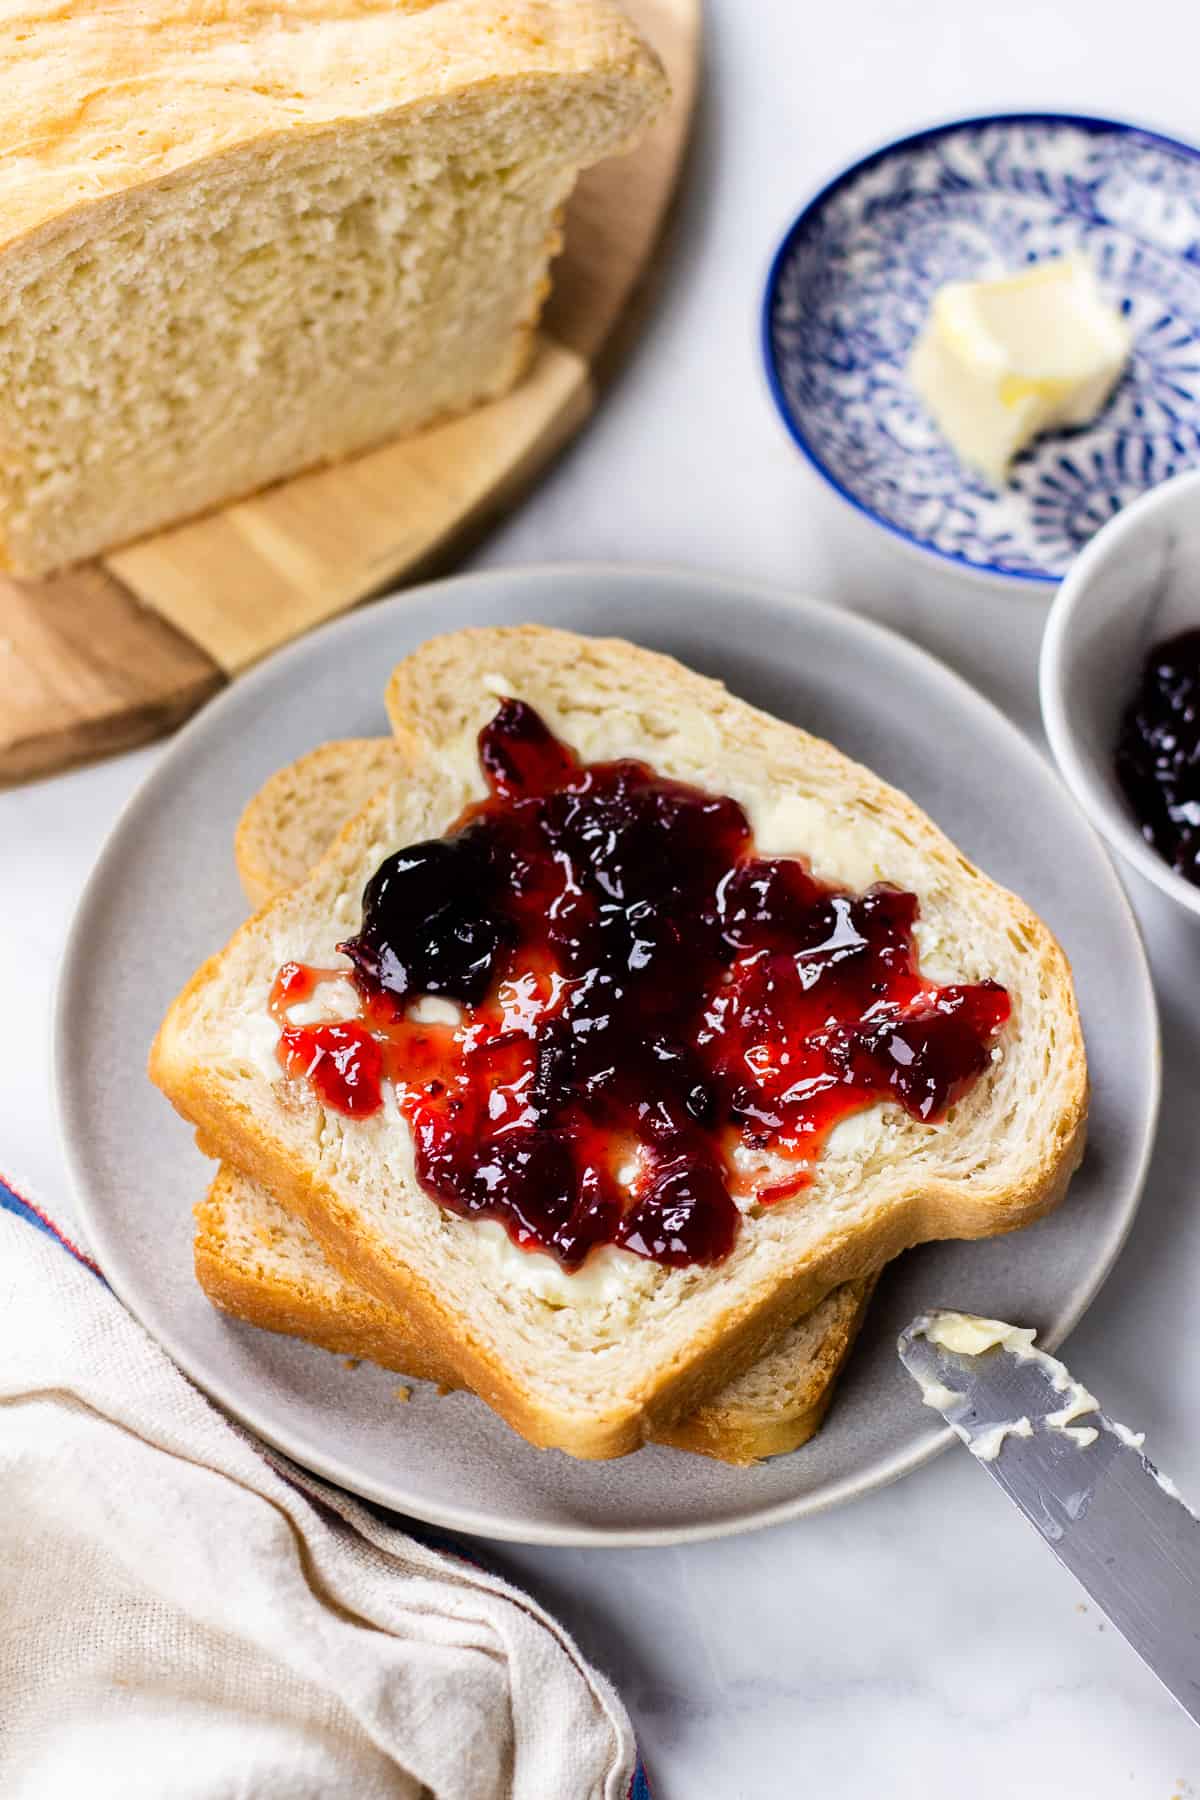
I like to use it for sandwiches, PB&J, toast, or even French toast. And you definitely want to have a slice or two with a Dutch Oven Beef Stew, Borscht Soup with Beef, or Instant Pot Italian Wedding Soup.
Believe me, you will TASTE the difference between the store bought and homemade variety!
Why making it at home
- It’s easy to make
- No preservatives
- Your house will smell like a bakery!
Why this recipe works
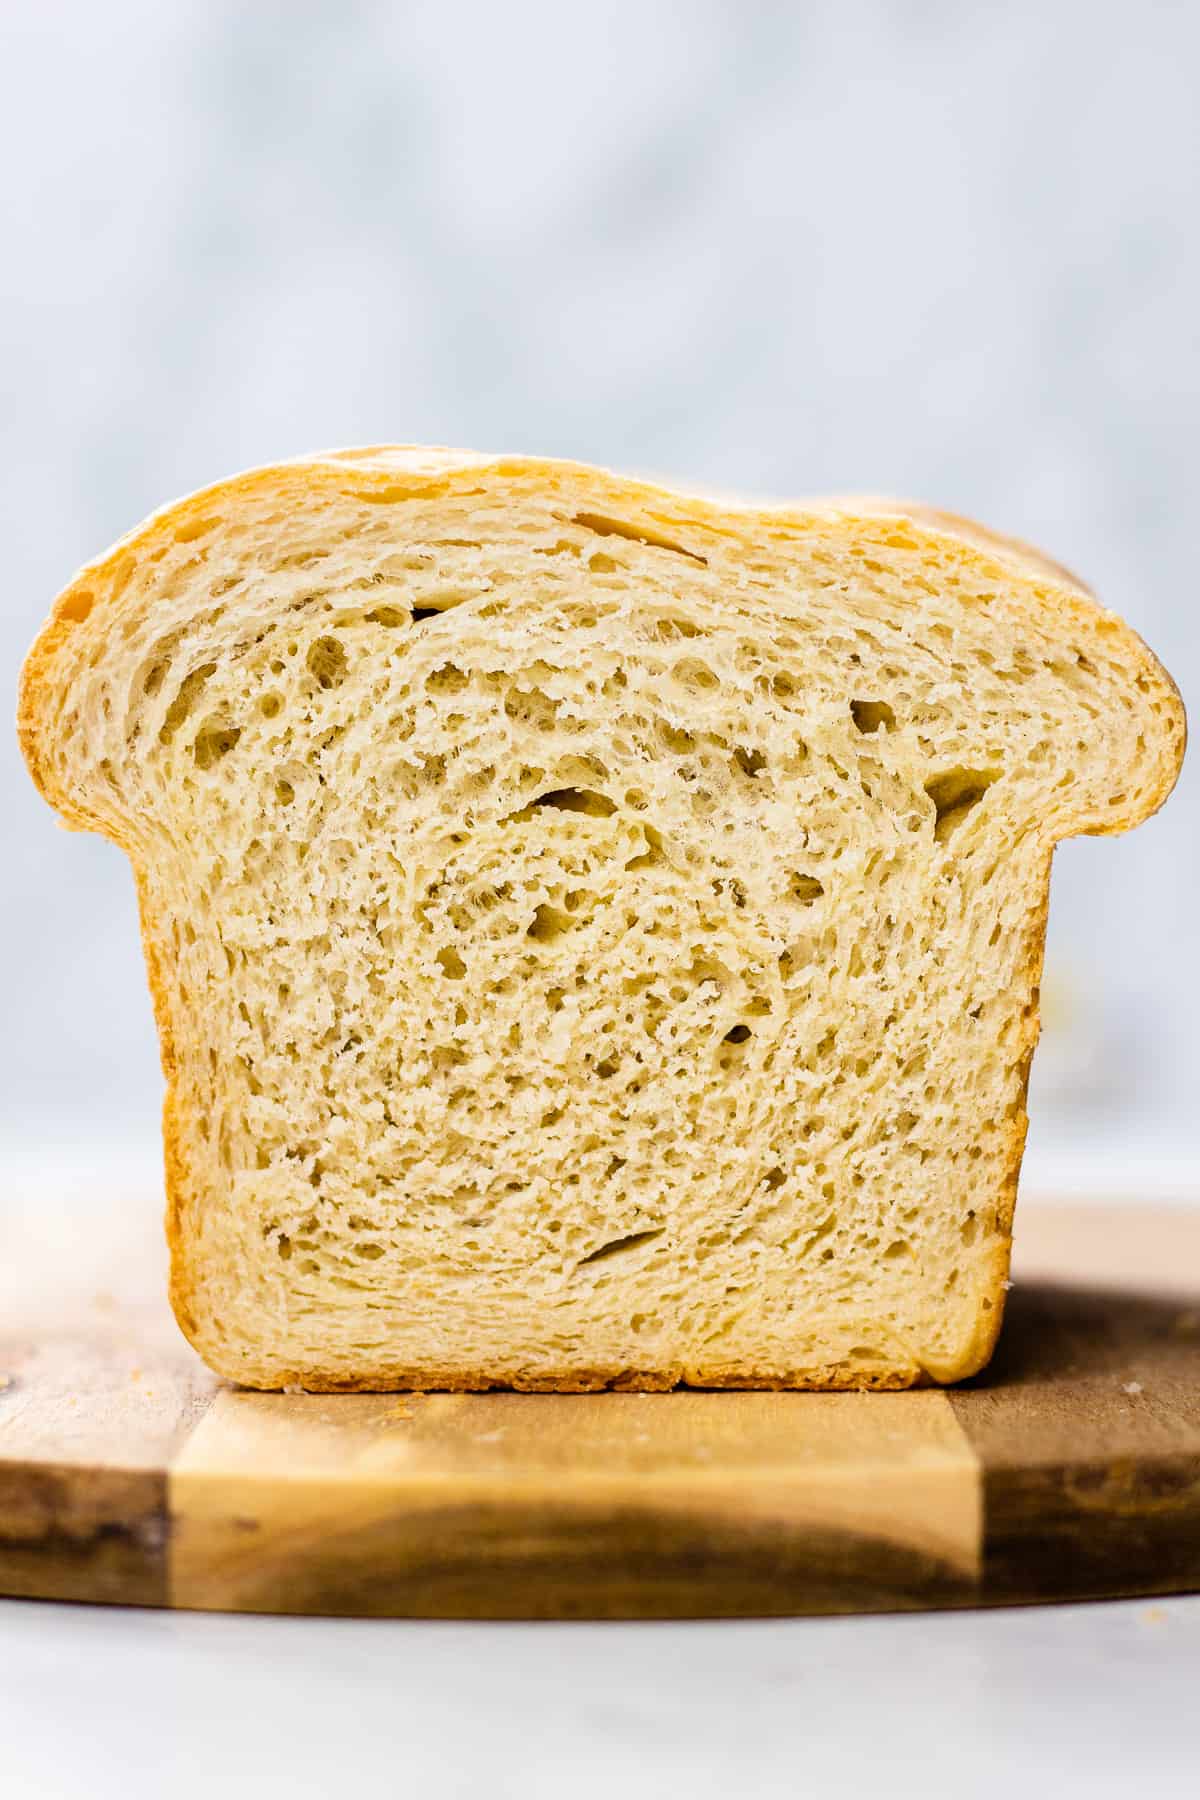
The perfect sandwich bread should be soft and chewy inside while having a beautiful golden bake outside. This is exactly what this recipe does!
Milk and butter provide enough fat to keep this dough soft, while enhancing the flavor.
How to make it
Make the dough
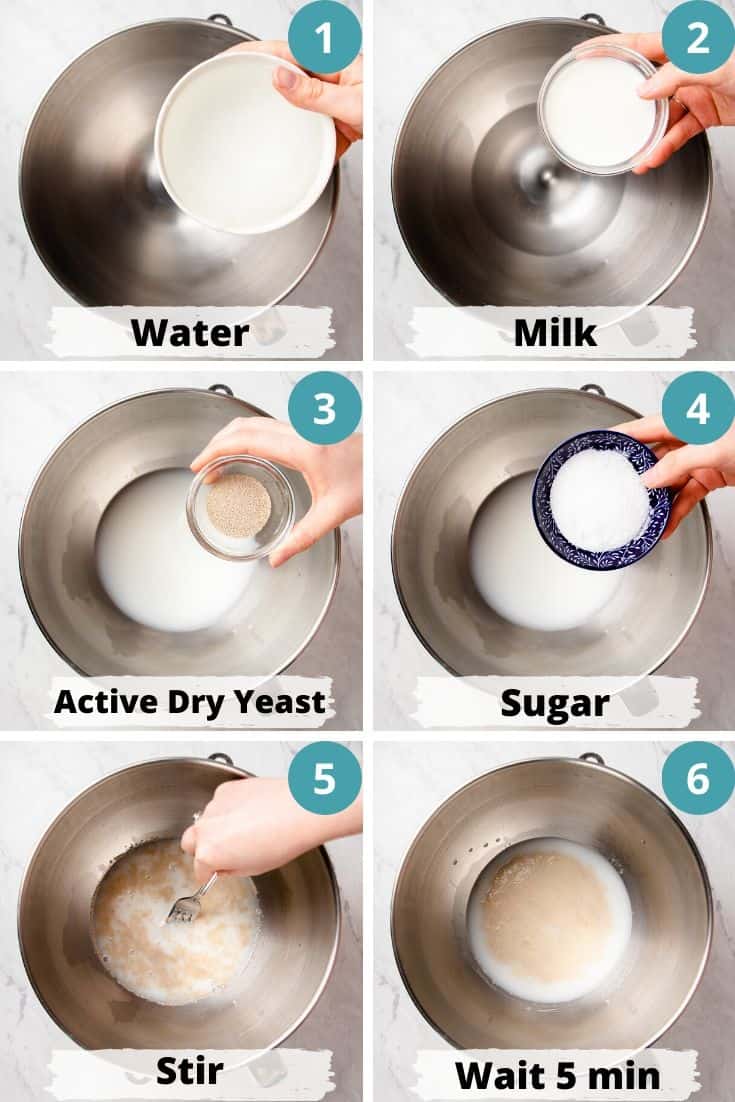
In the bowl of your stand mixer, put together warm water, warm milk, active dry yeast, and sugar. Give it a quick stir and let it sit for 5 minutes. During this time the yeast will activate and you will see bubbles on top of the mixture (Photos 1-6).
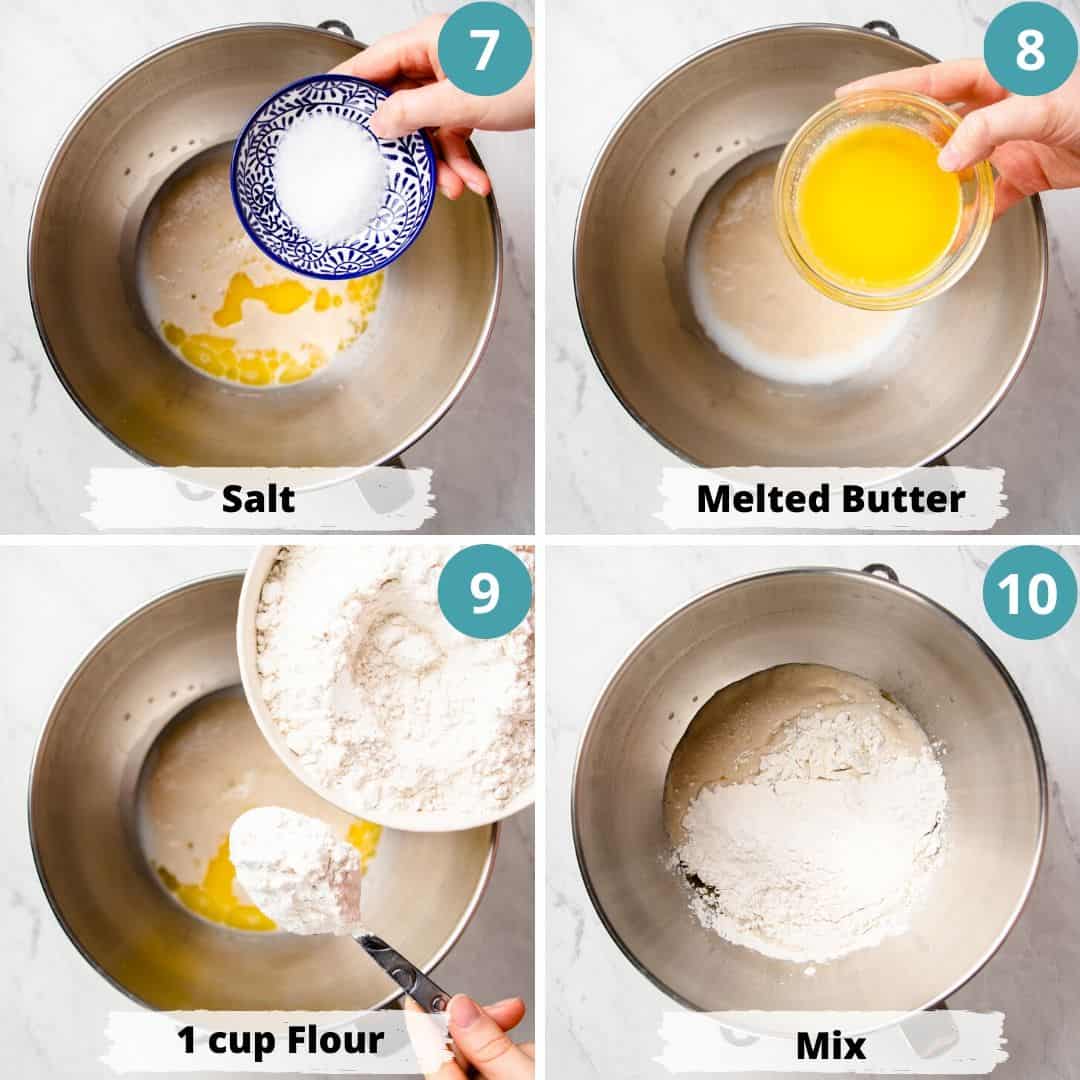
In 5 minutes, add salt, melted butter, and 1 cup of flour (Photos 7-10).
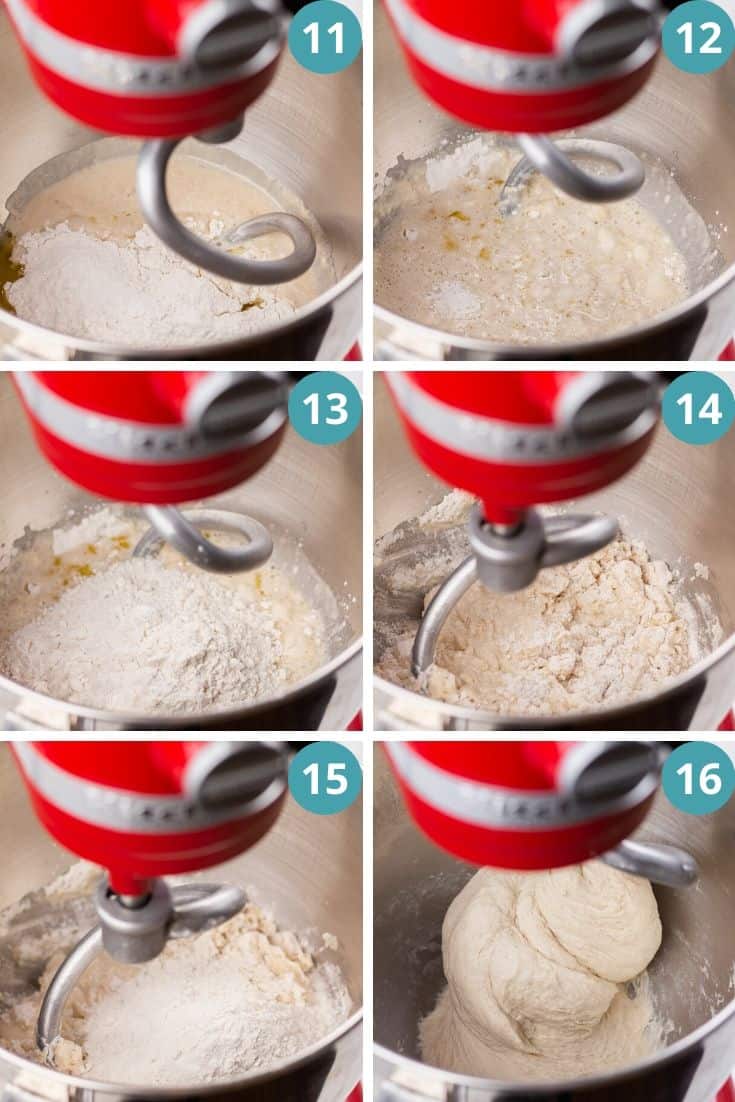
Using a dough attachment in a stand mixer, mix it on low speed until incorporated. Add another cup of flour and mix again. Then add the 3rd cup of the flour and mix until well incorporated (Photos 11-16).
Gradually add the rest of the flour 1 tablespoon at a time.
Increase the speed to medium/low and knead the dough in a stand mixer for 3-4 minutes. The dough should be a little bit sticky.
NOTE 1: Since different flour brands have different amount of moisture and texture, you might need less or more flour. Just make sure that your dough is smooth and stays together but still a little bit sticky. If the dough is be too dry, you might end u with tough bread.
NOTE 2: If you don’t have a stand mixer, you can mix all the ingredients in a mixing bowl and knead dough by hand.
1st rise
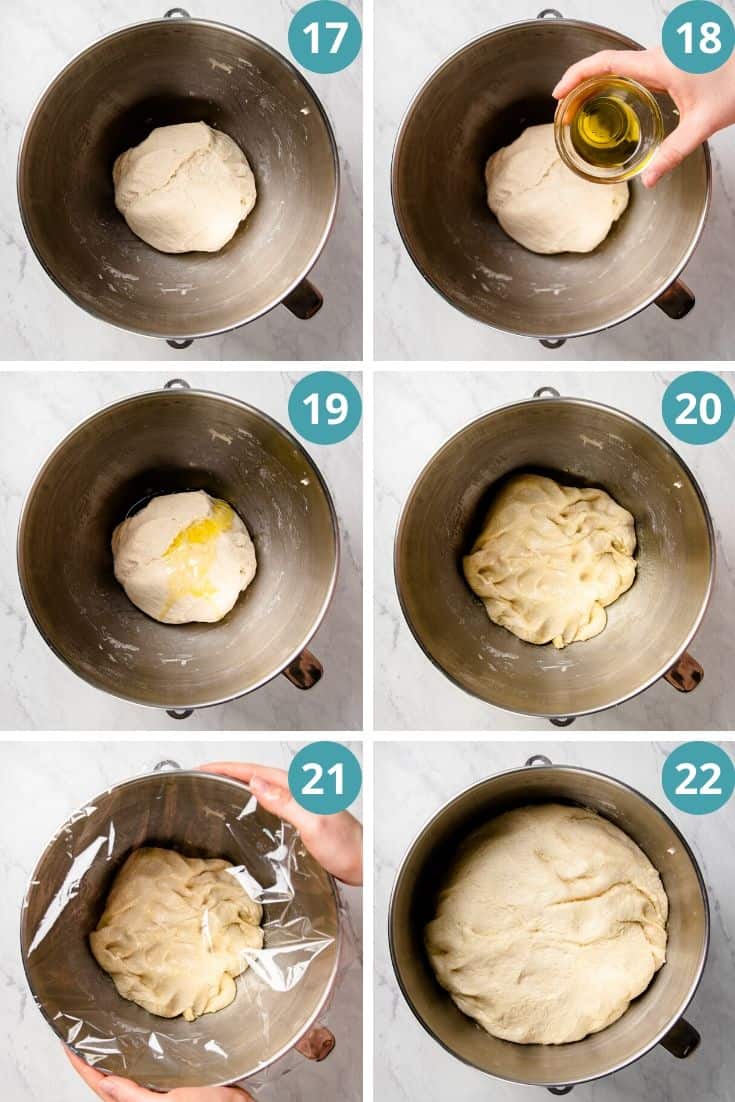
Lightly grease the dough from all sides with olive oil and put it back into the bowl. Cover with plastic wrap and a towel. Let it rise for 2 hours, it will double in size (Photos 17-22).
Shape
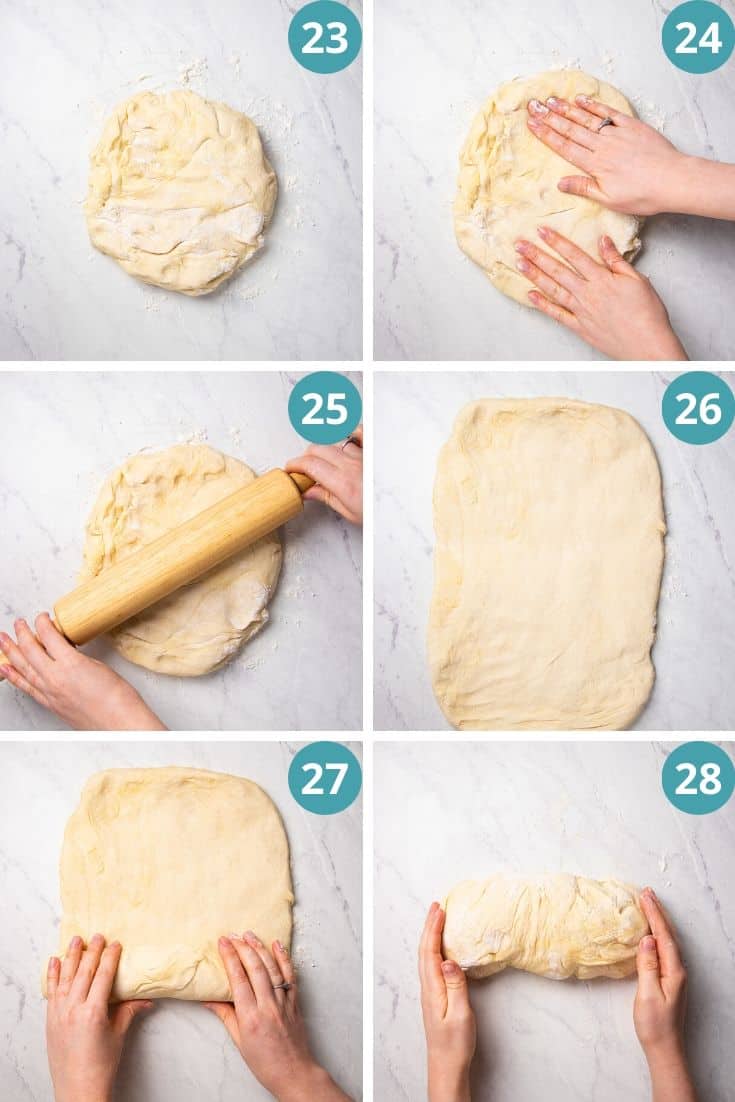
When the dough is ready, punch it down to release the air and place it on a lightly floured work surface. Using your hands or a rolling pin, roll the dough in a rectangular shape, about 8×15 inches (Photos 23-28).
Roll it up in a log in put in a lightly greased 9×5 loaf pan (Photo 29).
2nd rise
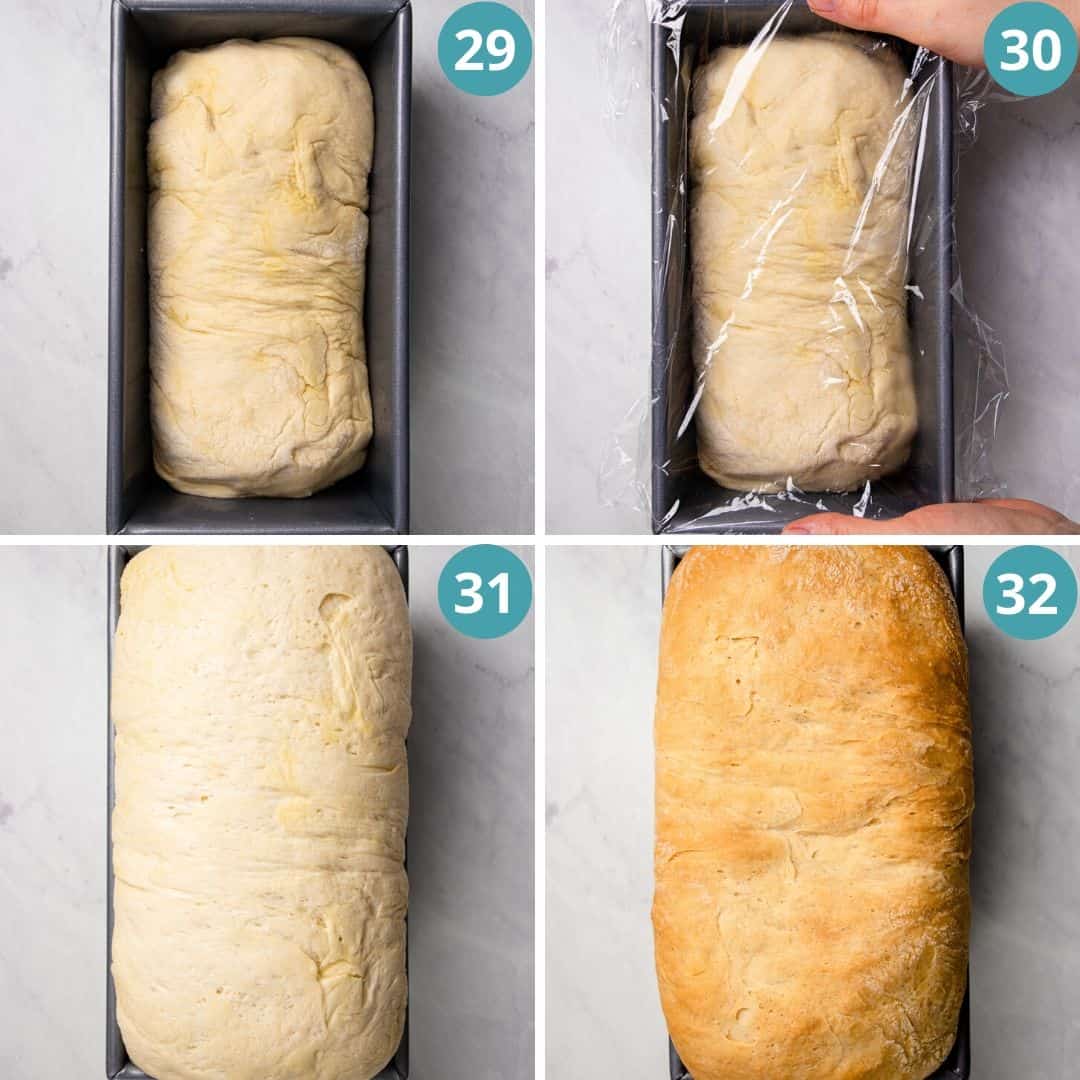
Cover again with plastic wrap and a towel and let it rise for 1 hour. It should rise about 1-1 ½ inch above the top of the loaf pan (Photos 30-31).
Bake
When ready to bake, preheat the oven to 350°F and adjust the rack to a lower level. By placing the pan to a lower level, it will prevent the top from burning.
Bake for about 30-35 minutes or until the internal temperature reached 195°F.
Check the bread 20 minutes after it starts baking. If the top is getting too dark, loosely cover it with aluminum foil.
When it’s baked, take it out of the oven and let it sit in a pan for 10 minutes. Then transfer to a wire rack to cool of completely.
Tips for best results
- When you knead the dough, it should be a bit sticky (like Pizza Dough). That will help the bread to stay softer and chewier after it’s baked.
- Because different flour brands have different flour texture and moisture, you might need less or more flour in your dough. That’s why I like to gradually add the flour and just look at the dough texture. When you knead it, it should become a nice smooth ball but still be a little bit sticky.
- Don’t skip milk and don’t substitute it with water in this recipe. This is one of the key ingredients for soft texture.
- I use all-purpose flour in this recipe as it’s the most popular type of flour that everyone has in their pantry. If you have bread flour at home, feel free to use it. It will help the bread to be softer with chewier crust.
- When baking, make sure you put it on a lower rack not to burn the top. If it starts to get too dark, loosely cover with foil to prevent burning.
FREQUENTLY ASKED QUESTIONS
How to store it? Since this recipe doesn’t have preservatives like a store-bought variety, it doesn’t keep as long. I like to wrap the it with plastic wrap (after it cools off completely) and put it in the fridge. This way it will stay fresh for 5-7 days.
Can I freeze it? Yes! First wrap it in a plastic wrap, then in foil. It will stay fresh in the freezer for up to 2 months. You also can slice the bread before freezing so it will be easier to thaw just by putting slices in the toaster to warm up.
Want more Bread?
Did you make this recipe?!? I’d love to know how it turned out! leave a comment and a rating below👇 thank you!
Homemade Sandwich Bread Recipe
Ingredients
- 1 cup warm water (about 110°F)
- ¼ cup warm milk (about 110°F)
- 2 ¼ teaspoon active dry yeast (or 1 packet)
- 2 tablespoons granulated sugar
- 1 ⅔ teaspoons salt
- 4 tablespoons unsalted butter melted
- 3 ¼-3 ½ cups all-purpose flour or bread flour
- 1 tablespoon olive oil (for greasing)
Instructions
- In the bowl of your stand mixer, put together 1 cup warm water, ¼ cup warm milk, 2 ¼ tsp active dry yeast, and 2 tbsp sugar. Give it a quick stir and let it sit for 5 minutes. During this time the yeast will activate and you will see bubbles on top of the mixture.
- In 5 minutes, add 1 ⅔ tsp salt, ¼ cup melted butter, and 1 cup of flour.
- Using a dough attachment in a stand mixer, mix it on low speed until incorporated. Add another cup of flour and mix again. Then add the 3rd cup of the flour and mix until well incorporated.
- Gradually add the rest of the flour 1 tablespoon at a time.
- Increase the speed to medium/low and knead the dough in a stand mixer for 3-4 minutes. The dough should be a little bit sticky.
- NOTE 1: Since different flour brands have different amount of moisture and texture, you might need less or more flour. Just make sure that your dough is smooth and stays together but still a little bit sticky. If the dough is be too dry, you might end u with tough bread.
- Lightly grease the dough from all sides with olive oil and put it back into the bowl. Cover with plastic wrap and a towel. Let the dough rise for 2 hours, it will double in size.
- When the dough is ready, punch it down to release the air and place it on a lightly floured work surface. Using your hands or a rolling pin, roll the dough in a rectangular shape, about 8×15 inches.
- Roll it up in a log in put in a lightly greased 9×5 loaf pan.
- Cover again with plastic wrap and a towel and let it rise for 1 hour. The dough should rise about 1-1 ½ inch above the top of the loaf pan.
- When ready to bake, preheat the oven to 350°F and adjust the rack to a lower level. By placing the pan to a lower level, it will prevent the top from burning.
- Bake for about 30-35 minutes or until the internal temperature reached 195°F.
- Check the bread 20 minutes after it starts baking. If the top is getting too dark, loosely cover it with aluminum foil.
- When it's baked, take it out of the oven and let it sit in a pan for 10 minutes. Then transfer to a wire rack to cool of completely.


This is now my go too recipe! Thank you!
Thank you so much, Michelle!
Hi Veronika, I am just wondering if you know whether this recipe could use half whole wheat or wholegrain and half all purpose white? Thanks in advance for your reply
Hi Donna. Unfortunately, I never tested this bread recipe with other flour but I’m pretty sure it should work.
Thankyou for this lovely recipe. I always envy people who can bake bread. Now, I can bake it myself. My bread turns out soft and delicious!
This bread is absolutely delicious! So easy to follow the recipe. I ate some of it by the slice and I’m currently making a garlic bread out of some slices to go with my homemade lasagna! 100% the only sandwich bread I’ll be making. Also bonus points…. the boyfriend is obsessed as well!!!
Thank you for such a wonderful simple recipe!
Thank you, Kendall! I’m so happy you and your boyfriend liked it! I’m making this bread at least twice a week!
Bread baking is the most therapeutic thing to do, which is much needed this hour! Thise sandwich bread looks so perfect! Love it.
What a perfect looking homemade bread! We are eating way more sandwiches now that we are staying at home, and I have a ton of time to bake more! This bread is definitely happening at our house next week!
Love how simple this recipe is (few ingredients) and yet it looks amazing. I mean, a bread doesn’t need to contain too many “extra” (read “strange”) ingredients and this one is perfect and healthy. Love it!
This is great!! I can’t get to the store much these days because of the quarantine and lucky for me, I happen to have snagged some flour and yeast! I bet my kids are going to appreciate homemade bread!
Nothing can compare to the smell of freshly baked bread. Your sandwich bread looks amazing, love it in the morning with jam!
Oh my gosh, I haven’t made sandwich bread in years..it was making me nostalgic looking at your great pictures! I’m going to make this soon, I really am.
I am not good in making bread but this one looks really delicious and look so easy make, I am going to try this out. Thanks for sharing your recipe with us!
You make it look so easy with the step by step instructions, but they are oh so helpful! Nothing beats homemade bread.
In love with this easy bread recipe! Made it last night and the bread came out just wonderful. Fluffy, soft, perfect for sandwiches or French toast! Perfect recipe, especially during these strange times at the moment.
Can this recipe be doubled?
Hi Sharon. For the best results, I would recommend to make 2 separate batches. This is a type of the recipe where you cannot just double the ingredients.
During all this craziness…the art of bread making may become the NEW skill people learn in the kitchen. I love homemade bread….and this looks perfect to me. Great for any meal of the day.
Thank you, Gloria! That’s true. This is unfortunate what’s happening now, but it’s always good to know how to make your own bread!